All over the world people love apples! And is there any way better to celebrate the changing seasons than with an Apple Cake in the Fall? This Disappearing Apple Cake is a uniquely French approach which is easy to make and makes a real apple statement!
Apples are one of the oldest and most loved fruits out there. Almost every country in the Northern hemisphere has cakes and desserts centered around apples. And now is the best season for apples. They are fresh, crispy and the varieties are endless. I have shared with you an Australian Apple Cake in the past and now I am traveling back to France!
My eyes were recently drawn to a posting from Serious Eats for a French Gateau Invisible, an Invisible Apple Cake. And it was good but to my mind the author unnecessarily complicated the recipe with the addition of Japanese Miso. Why mess with a classic?
I did some recipe research and the form of the cake is pretty basic: apples are peeled and thinly sliced, then tossed in a cake batter before being layered into a loaf pan and baked.
Start with the apples. You can use pretty much any apple you like. Softer apples or apples that fall apart when baking will produce a different texture from a sturdier apple. I used Pink Ladies and Gala apples. Both worked fine.
The second determining factor in your cake is the size of your slices. A thicker slice will be easier to layer in the pan but thinner slices will more fully “disappear” into the finished cake.
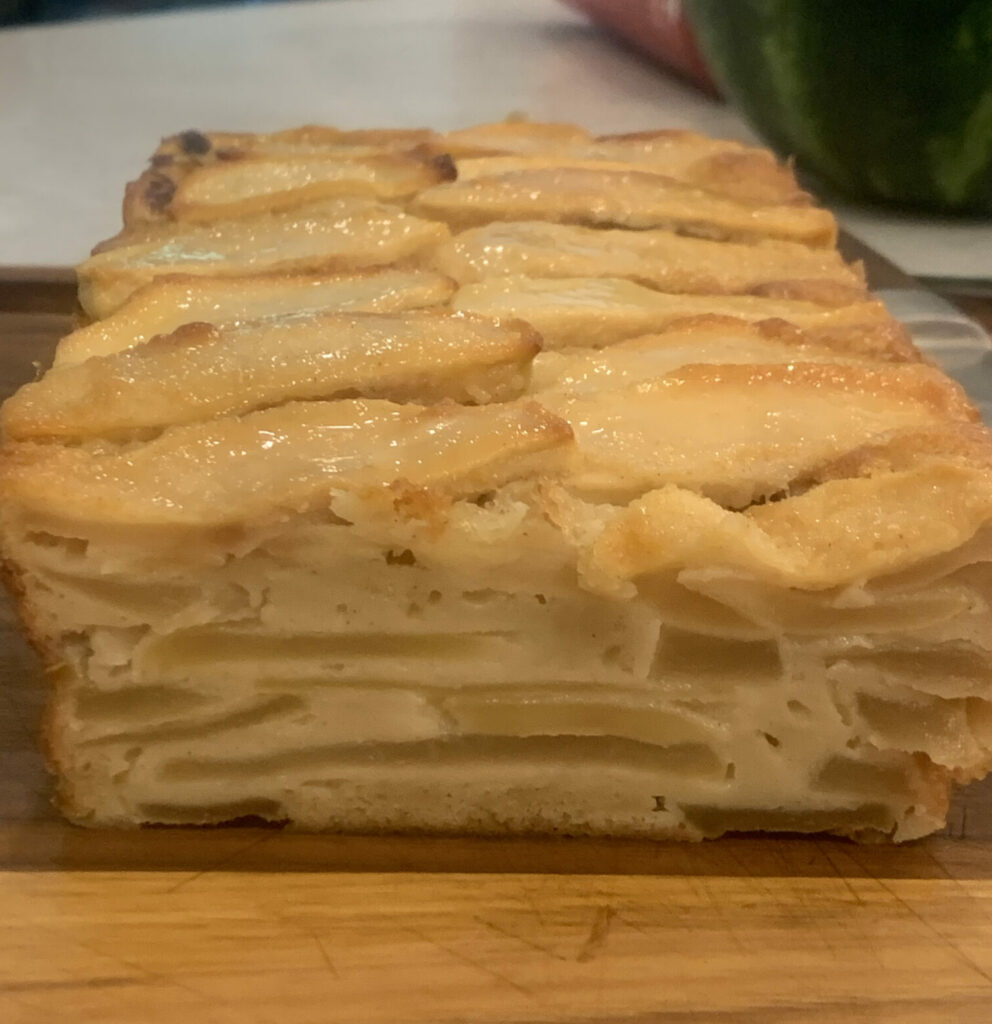
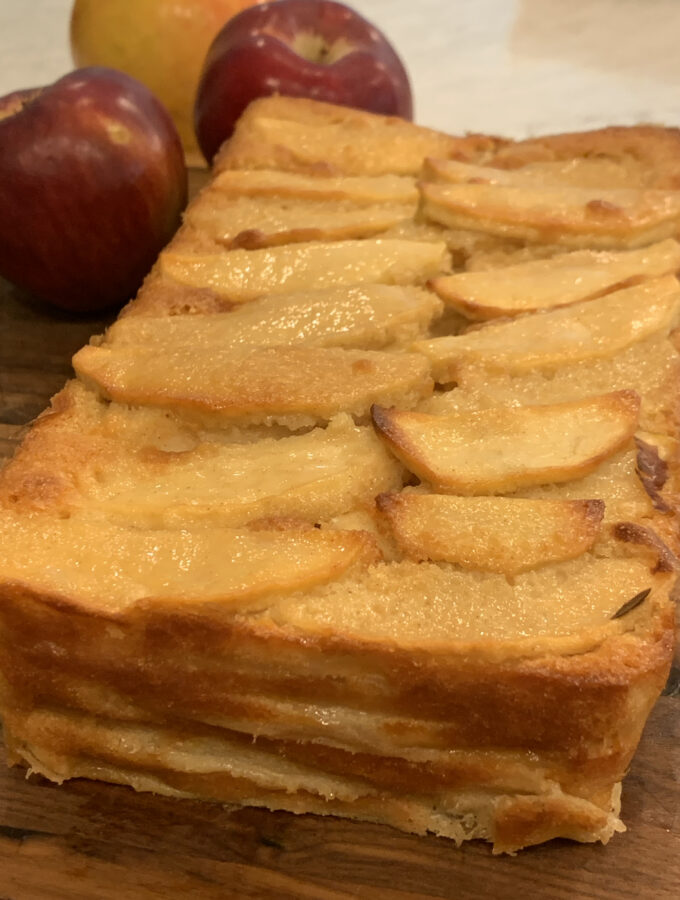
This cake was made with slightly thicker slices. Thinner slices will produce less of a distinction between the apples and the cake
Make the cake batter by whisking together the eggs and sugar until they have thickened and are a pale light yellow.
Add the flour and spices alternately with the milk and melted butter. Finally stir in a little vanilla (almond extract would also be a nice touch!)
Layer the apples in the pan. You can just pile them in there, or, if you would like a fancy effect, place them in making sure the flat edges rest against the sides of the pan.
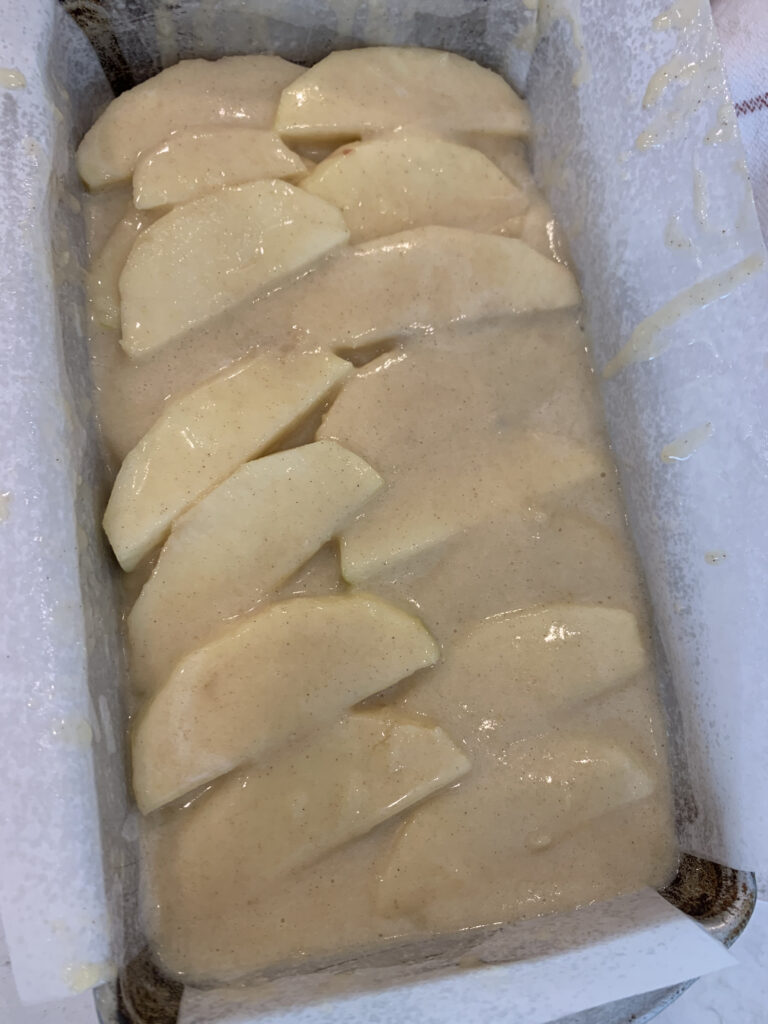
Most of the apples slices should be placed with the flat edges against the pan. But the final layer should be placed in a decorative manner
Bake, cool and cut!
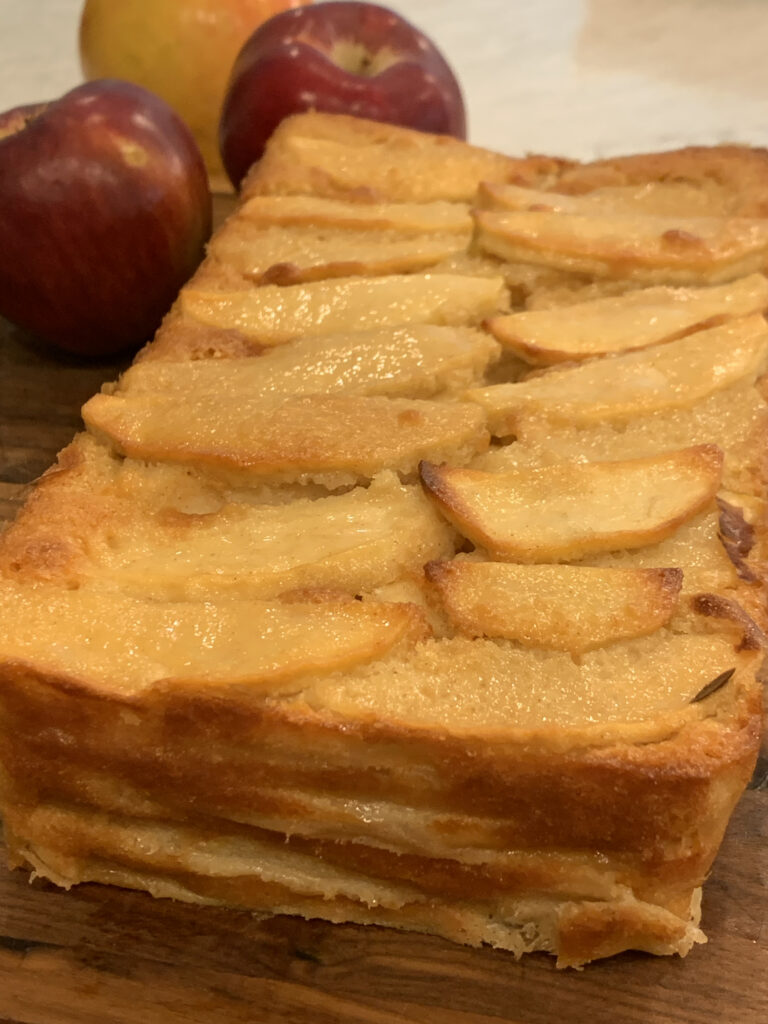
Unmoldthe cake after it cools
Serve the cake warm or at room temperature. My family especially liked it for breakfast!
FRENCH DISAPPEARING APPLE CAKE
Ingredients
- 1 c flour
- 1 tsp baking powder
- ¼ tsp cinnamon
- ¼ tsp salt
- 3 tbs butter melted
- ½ c milk
- 3 eggs
- 2/3 c sugar
- ½ tsp vanilla
- 2 ½ lbs apples
Instructions
- Preheat the oven to 350 degrees. Prepare a 9” loaf pan by spraying lightly with oil. Line the bottoms and sides with a sheet of parchment paper, leaving some paper hanging over the sides. Spray the paper with baking spray.
- Peel and thinly slice the apples. Place them in a medium to large bowl.
- Place the flour, baking powder, cinnamon and salt in a small bowl and stir well to mix.
- In the bowl of your mixer whisk together the sugar and eggs until they are thick and pale yellow in color, 2-3 minutes.
- Whisk in half of the flour until just mixed in. Add the milk and butter, stir it in and then finish with the rest of the flour. Finally stir in the vanilla.
- Pour the batter into the bowl with the apples and stir the batter into the apples. Separate any apples that are sticking together, making sure each slice gets coated with batter.
- Either turn all of the apples and batter into your prepared pan or place them in by hand for a finer finish. If placing by hand, line the apples up so that the flat edges of the slices are against the sides of the pan. Reserve 20-30 slices to make a top layer in which the apples are shingled. Pour any remaining batter in the pan over the top of the apples.
- Press down lightly on the apples to distribute them evenly and drop the pan lightly to fill any pockets.
- Bake for 60-65 minutes until the cake is risen and a tester comes out clean.
- Once baked, remove from the oven and place on a wire rack. Use a knife to separate the cake from the sides of the pan. Cool completely before removing from the pan.
- To remove, lift the cake out with the sides of the parchment paper. Remove paper and serve.
Recipe Notes
Note: The cake will be different depending on how thickly you cut the apples. A very thin cut (1/4”) will make the apples almost completely disappear. A thicker cut (1/2”) will show more layers in each slice.




Did you enjoy this post? Leave a comment below. If you tried the recipe, let me know how it turned out!